When Should Mercedes-Benz GLE Coupé AMG Brake Pads and Rotors Be Replaced?
Mercedes-Benz GLE Coupe AMG
Mercedes-Benz GLE Coupe AMG•
•75 views
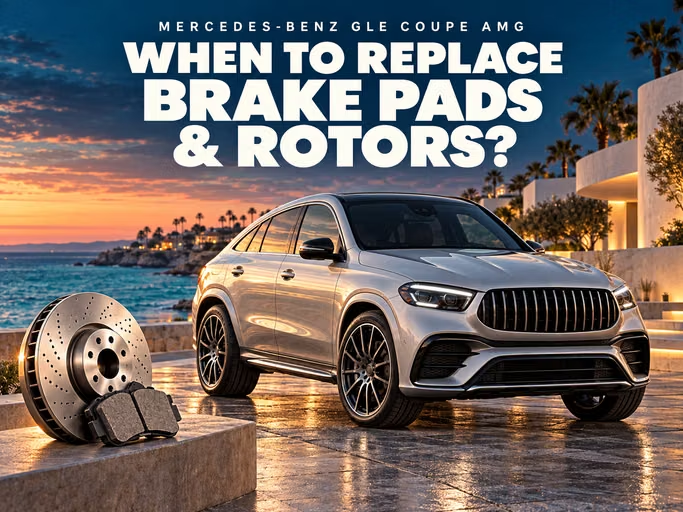
Replace Mercedes-Benz GLE Coupé AMG brake pads and rotors according to their condition, rather than a single mileage figure. Urban driving can wear the linings gradually, while repeated hard stops may cause heat damage that requires attention sooner. Inspect every pad, measure the rotors and check caliper operation before deciding what to replace.
This article covers AMG versions of the C292 and C167 GLE Coupé. GLE 43, GLE 53 and GLE 63/63 S models use different brake packages; the GLE 53 HYBRID plug-in model and any fitted carbon-ceramic system also require separate consideration. The model name starts the parts search, but cannot replace the VIN and equipment codes.
Identify the Fitted Brake Package First
Record the VIN, build year, full AMG designation and installed part numbers before ordering. Compare these with the catalogue: a previous owner may have changed the calipers or rotors. Caliper colour, wheel diameter and an AMG badge do not establish compatibility on their own.
Pads must match the specific caliper and rotor material. For rotors, check thickness, height, mounting and construction as well as outside diameter. Wear sensors and fitting hardware must also match the assembly. A part for a conventional GLE with AMG Line styling is not automatically suitable for a Mercedes-AMG model.
- C292. Identify whether the brakes belong to a GLE 43, GLE 63 or GLE 63 S; do not transfer part numbers between variants.
- C167. Match the exact GLE 53 or GLE 63/63 S variant, model year and factory options.
- GLE 53 HYBRID. Check its own parts applicability; regenerative braking does not remove the need to inspect the friction brakes.
- Modified systems. Follow the specifications of the actual fitted kit and its manufacturer.
Metallic and Carbon-Ceramic Rotors
Metallic rotors are assessed for thickness, geometry and surface condition. A carbon-ceramic package requires the manufacturer’s separate inspection method; a conventional thickness measurement is not enough. A drilled surface does not prove that a rotor is ceramic. Establish the material before dismantling the assembly or selecting pads.
When Replacement Is Necessary
In the March 2021 GLE Coupé C167 manual, the Check brake pads See Owner’s Manual message means the pads have reached their wear limit and a qualified workshop should be consulted. Use the document for your own model year. A pad warning does not show the remaining rotor thickness.
- Friction material has reached the limit for the fitted package, or is damaged or contaminated.
- A metallic rotor has reached its minimum thickness, or its geometry is outside the service tolerance.
- Cracking, surface breakdown or heat damage makes continued use of the component unsafe.
- Binding or a mounting fault has already damaged a pad or rotor; the cause needs correction alongside replacement.
The absence of a dashboard message does not replace inspection: an inner pad may wear differently from the outer one. Arrange a prompt check when a warning appears. If grinding, strong pull, smoke or a clear loss of braking occurs, stop safely and seek assistance.
What the Workshop Should Measure
With the wheels removed, inspect every pad and both rotor faces. On a metallic rotor, take several micrometer readings on the swept surface, clear of the outer lip. Compare the lowest reading with MIN TH and the manufacturer’s specifications. Ask for the results to be recorded for each wheel.
| Component | Inspection method | Purpose |
|---|---|---|
| Pads | Measure usable friction material on every inner and outer pad | Find differences, taper wear, cracking, and contamination |
| Metallic rotors | Measure thickness at several points without including the outer lip | Compare with the exact part limit and detect thickness variation |
| Runout and hub | Measure rotor runout; check the clean hub face if outside specification | Separate rotor geometry from dirt, corrosion, or hub play |
| Caliper | Inspect pistons, boots, pad fit and hardware; check slides where fitted | Find restricted movement, overheating, and uneven-wear causes |
Why an Inner Pad Can Wear Faster
Different lining thicknesses call for a mechanism check. Inspect the slides, piston and boots on a floating caliper, and piston operation on both sides of a fixed caliper. Check that pads move freely in their seats and that retaining hardware is sound. New pads will not prevent overheating if restricted movement remains.
Handling a Carbon-Ceramic System
The 2021 Mercedes-AMG GLE Coupé supplement specifically warns that a wheel rim can damage a ceramic rotor during wheel removal. Tell the workshop which system is fitted before work starts. Assess wear and damage using its service instructions; conventional metallic-rotor resurfacing does not apply to ceramic rotors.
Noise and Vibration Need Different Checks
Record whether the symptom began after washing, extended parking, light pedal pressure or hard braking. Note whether vibration is felt in the steering wheel, pedal or body. Even with performance brakes, a persistent new noise should not be dismissed as an AMG characteristic without inspection.
| Symptom | Possible causes | Next step |
|---|---|---|
| Brief noise after parking | Moisture or surface corrosion on a metallic rotor | Check whether it clears after several safe brake applications |
| Persistent squeal | Wear, contamination, pad vibration or hardware | Remove the wheels and inspect both pads in each caliper |
| Metallic grinding | Critical wear or trapped debris | Stop normal use and inspect both rotor faces |
| Pulsation | Thickness variation, runout, dirty hub, or bearing play | Measure the rotor and hub before buying components |
| Pull or one hot wheel | Binding, hose fault, contamination, tyres, or suspension | Compare brake force and free wheel rotation |
Why New Rotors May Not Cure Pulsation
Possible causes include rotor thickness variation, pad-material deposits, contamination at the mounting face or hub play. Clean and inspect the hub before fitting new components, then check runout after assembly. Correct, even wheel-fastener tightening matters too; otherwise the complaint may return.
Conditions That Shorten AMG Brake Life
- repeated hard deceleration from high speed;
- frequent braking in dense urban traffic;
- heavy loads, permitted trailer use and long descents;
- binding pistons, caliper slides or pads;
- extended parking with wet metallic rotors;
- sand, dirt and trapped debris in the brake assembly;
- unsuitable friction material or installation errors.
After demanding driving, watch for changes in pedal feel, vibration and an overheated smell. Do not spray water onto hot rotors. Sand or mud exposure calls for inspection and cleaning. On a GLE 53 HYBRID, thick linings do not rule out corrosion of metallic rotors: inspect their surfaces even when regeneration is used frequently.
Parking Brake Procedures and Bedding
Rear-brake work must follow the procedure for the fitted parking-brake mechanism. Use an electric actuator’s service mode where required by the repair instructions; do not force a piston back without preparation. After assembly, check pedal feel, leaks and parking-brake operation. Follow the kit’s bedding instructions and avoid unnecessary hard stops.
Workshop Checklist
Agree on diagnosis of the wear causes before ordering parts. The workshop must account for the lifting procedure on an air-suspension vehicle and the permitted brake-test method for its all-wheel-drive system.
☐ Confirm the VIN, C292 or C167 generation, AMG variant and brake type.
☐ Record symptoms and when they occur, including recent overheating.
☐ Read system messages and retain diagnostic results before dismantling.
☐ Inspect every pad, both rotor faces and caliper condition.
☐ Measure metallic rotors; inspect ceramic rotors using their separate procedure.
☐ For pulsation, check thickness variation, runout and hub condition.
☐ Inspect pistons, boots, pad seats, retaining hardware and slides.
☐ Verify the applicability of pads, rotors, sensors and fitting hardware.
☐ Follow the parking-brake procedure and specified tightening torques.
☐ Check pedal feel, leaks and brake forces, then complete bedding.
Mistakes to Avoid
- ordering parts solely from an AMG badge or caliper colour;
- replacing one pad or one rotor instead of an axle set;
- applying conventional resurfacing or a universal thickness limit to ceramic rotors;
- installing new components without correcting binding or hub contamination;
- treating a cleared warning as proof that the repair is complete;
- testing at speed with a leak, changed pedal feel or an overheated wheel.
Conclusion
Measurements and inspection determine when GLE Coupé AMG brakes need replacement. Identify the variant and rotor material first, then check every pad, the calipers and the hubs. Overheating calls for inspection of the whole assembly, not just lining thickness. Correct the cause of damage before fitting replacement axle sets.
If you are choosing a used GLE Coupé AMG, current listings can help you compare versions. Before buying, request the brake repair history, installed part numbers and recorded measurements. Pay particular attention to modified or carbon-ceramic systems: the appearance of the wheels cannot reveal their remaining service life.