When Should Mercedes-Benz GLC Brake Pads and Rotors Be Replaced?
Mercedes-Benz GLC
Mercedes-Benz GLC•
•204 views
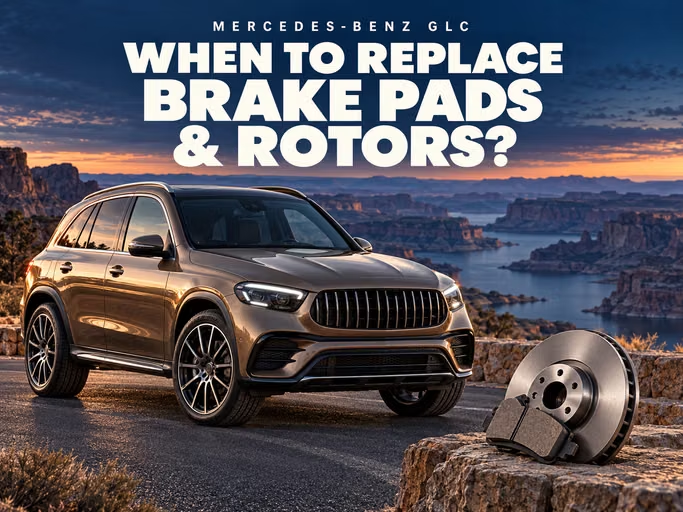
Replace Mercedes-Benz GLC brake pads and rotors according to measured wear and friction-surface condition. Urban stops, speed, vehicle load and descents affect service life. Two SUVs with the same mileage may need different work: one may only need monitoring, while the other requires replacement parts and a caliper repair.
This article covers combustion-engine GLC and GLC Coupé models in the X253/C253 and X254/C254 families, including hybrids. Conventional versions and Mercedes-AMG models have different brake packages and service limits. Identify the fitted assembly and the cause of wear before replacing components.
Identify the GLC Generation and Brake Package
A designation such as GLC 300 or GLC 220 d is not enough to order parts. Check the generation, model year, engine and equipment codes. AMG Line styling, a sports brake package and a Mercedes-AMG model are different identifiers; exterior appearance does not establish pad fitment.
For example, the STREET+ catalogue lists PAGID T8313SP2001 front pads for the GLC 300 4MATIC X254 (254.647) from June 2022, with a sport-package restriction. This is a part for a specific configuration. Before ordering, check the VIN, brake equipment code and fitted caliper; the part is not universal across the GLC range.
- X253 and C253. Match the year, engine and factory brake package; SUV or Coupé bodywork alone does not identify the parts.
- X254 and C254. Account for equipment codes, the hybrid system and a sports brake package where fitted.
- Mercedes-AMG. Check the exact variant and rotor material; conventional-model specifications may not apply.
- Modified vehicles. Compare catalogue data with markings on the components actually installed.
How Regeneration Changes Plug-in Hybrid Braking
On a plug-in hybrid, the electric motor helps slow the vehicle and returns energy to the battery. Pads may wear more slowly under this operating pattern, but rotor surfaces still need inspection. Check corrosion, uneven contact marks and free pad movement. Generous friction-material thickness does not rule out problems with the conventional brakes.
When the Components Actually Need Replacement
In the 2017 GLC SUV manual, the Check Brake Pad Wear message means the linings have reached their wear limit and a qualified workshop should be consulted. Use the appropriate documentation for other years and generations. Rotors also require measurement: a functioning pad sensor gives no indication of rotor thickness.
- The friction material has reached its specified limit, is damaged or is contaminated. A pad-wear message requires prompt workshop attention.
- Rotor thickness has reached its minimum, or geometry remains outside specification after the hub and installation have been checked.
- Cracks, substantial surface damage or heat damage make the component unsafe to retain.
- Uneven wear accompanies a caliper or mounting fault that has already damaged the pad or rotor.
A wear sensor does not measure rotor thickness or replace inspection of every pad. The absence of a warning does not confirm that the brakes are healthy. Arrange a prompt inspection for a wear message; if grinding, strong pull or reduced braking occurs, stop the journey safely.
What to Check After Removing the Wheels
Looking through the spokes is not enough. With the wheels removed, inspect every pad and both faces of each rotor. For metallic rotors, measure thickness at several points away from the outer lip and compare the lowest reading with the MIN TH marking and exact component service data. Record results separately for each wheel.
| Component | Inspection method | Purpose |
|---|---|---|
| Pads | Measure usable friction material on every inner and outer pad | Find differences, taper wear, cracking, and contamination |
| Rotors | Measure thickness at several points without including the outer lip | Compare with the exact part limit and detect thickness variation |
| Runout and hub | Measure rotor runout; check the clean hub face if outside specification | Separate rotor geometry from dirt, corrosion, or hub play |
| Caliper | Inspect pistons, boots, pad fit and hardware; check slides where fitted | Find restricted movement, overheating, and uneven-wear causes |
Check Free Pad and Caliper Movement
Uneven wear calls for a cause to be identified. On a floating caliper, inspect the slides, piston and boots; on a fixed multi-piston caliper, check piston operation on both sides. Pad fit and retaining hardware matter in either design. Replacing pads without correcting binding can quickly lead to renewed overheating and uneven wear.
Check Rotor Surfaces and Material
The inboard rotor face may be more damaged than the visible outboard side. Assess deep scoring, corrosion, cracks and heat damage. Resurfacing a metallic rotor is only permissible when the manufacturer allows it and sufficient thickness remains after machining. A carbon-ceramic kit requires its manufacturer’s separate inspection method; a conventional thickness check alone is insufficient.
How to Investigate Noise and Vibration
Squeal after parking, pulsation under braking and grinding require different checks. Tell the technician whether the symptom occurs with cold brakes, after washing or during repeated stops. Note where vibration is felt. Sound alone cannot establish remaining lining thickness or confirm that a rotor is distorted.
| Symptom | Possible causes | Next step |
|---|---|---|
| Brief noise after parking | Moisture or light surface corrosion | Check whether it clears after several safe brake applications |
| Persistent squeal | Wear, contamination, pad vibration or hardware | Remove the wheels and inspect both pads in each caliper |
| Metallic grinding | Critical wear or trapped debris | Stop normal use and inspect both rotor faces |
| Pulsation | Thickness variation, runout, dirty hub, or bearing play | Measure the rotor and hub before buying components |
| Pull or one hot wheel | Binding, hose fault, contamination, tyres, or suspension | Compare brake force and free wheel rotation |
Why a New Rotor May Not Cure Pulsation
Repeat vibration can result from transferred pad material, thickness variation, corrosion between rotor and hub, bearing play, or uneven wheel-fastener torque. A new rotor mounted against a contaminated face can develop runout again. Confirm the cause with a micrometer and dial indicator rather than pedal feel alone.
Conditions That Accelerate GLC Brake Wear
- frequent stops and short journeys in dense traffic;
- repeated hard braking from high speed;
- heavy loads, trailer use and long descents;
- binding pistons, pads or caliper slides;
- moisture, extended parking and corrosion of the swept surfaces;
- brake contamination after dusty or muddy roads;
- incorrect components and previous repair errors.
After driving through mud or sand, inspect the brakes, particularly if a new noise appears. Compare measurements with earlier service records. On long descents, use the vehicle’s prescribed methods of controlling speed; continuous brake-pedal pressure increases heat load. If braking deteriorates, stop the journey safely.
Account for the Parking Brake and 4MATIC
Before replacing rear pads, follow the procedure for the fitted electric parking brake. Do not force a piston back without the required actuator preparation. For a GLC 4MATIC, the workshop must also choose a compatible brake test stand and test mode in accordance with the vehicle documentation. After assembly, check pedal feel, leaks and parking-brake operation, then follow the parts’ bedding instructions.
Diagnosis and Service Checklist
Agree on checks for the causes of wear as well as component replacement. If air suspension is fitted, confirm the vehicle-lifting procedure in the repair instructions too.
☐ Confirm the VIN, GLC generation, brake package and rotor material.
☐ Record noise, vibration, pull, overheating and the conditions in which they occur.
☐ Read brake-system messages and retain diagnostic information before dismantling.
☐ Remove the wheels and measure the inner and outer pads in every caliper.
☐ Measure rotor thickness at several points and compare it with the exact part limit.
☐ Check thickness variation, runout, hub cleanliness, and bearing play.
☐ Inspect pistons, boots, hardware and slides as appropriate to the caliper design.
☐ Select pads, rotors, sensors, and single-use hardware by VIN and installed assembly.
☐ Follow the parking-brake procedure and tighten fasteners to the specified settings.
☐ Check pedal feel and leaks, account for 4MATIC during testing and complete bedding.
Mistakes to Avoid
- selecting pads solely from the GLC badge, AMG Line styling or caliper appearance;
- replacing an individual pad or rotor instead of an axle set;
- judging a rotor without measurement and an inboard inspection;
- installing new components before correcting hub corrosion or restricted caliper movement;
- clearing warnings before repair and final verification are complete;
- conducting a road test with leakage, an unsafe pedal, or an overheated wheel.
Conclusion
Replace Mercedes-Benz GLC brakes according to measurements and inspection results. Check every lining, both rotor faces and free caliper operation. On a hybrid, regeneration does not remove the need to inspect for corrosion, while AMG versions require the exact brake-package specifications. Correct the cause of damage before installing replacement axle sets.
When choosing a used GLC, current listings can help you compare variants. Ask for the brake service history, recorded measurements and details of modifications. A lift inspection and a safe road test after the initial checks reveal more than the appearance of the rotors in photographs.