


When Should Mercedes-Benz E-Class Brake Pads and Rotors Be Replaced?
Mercedes-Benz E-Class
Mercedes-Benz E-Class•
•17 просмотров
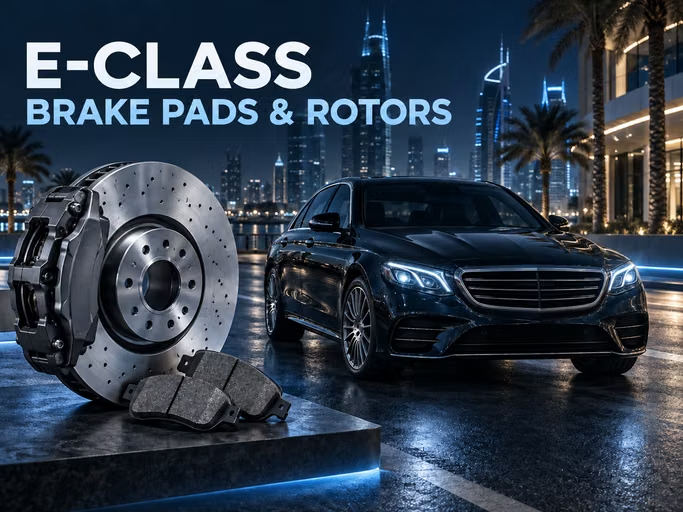
Mercedes-Benz E-Class brake pads and rotors do not have one replacement mileage that suits every car. Service life changes with the generation, fitted brake package, vehicle weight and powertrain, route profile, braking style, temperature, and caliper condition. Mileage is a reason to inspect; measured wear and physical condition determine replacement.
Diagnosis should cover the inner and outer pads, both faces of each rotor, wear sensors, pistons, slides, hubs, and the vehicle's behaviour under braking. Replacing only the most obvious worn component without finding the cause can leave taper wear, overheating, or runout and allow the complaint to return.
Identify the E-Class Version First
The E-Class name spans several generations and body styles, standard and performance variants, rear- and all-wheel drive, and mild- or plug-in hybrid powertrains. W212, W213, and W214 brake dimensions, calipers, sensors, and repair limits are not interchangeable. Even within one generation, the engine, wheel package, and factory options can change the fitted hardware.
Before ordering components, record the VIN, full model designation, chassis code, build date, engine, drivetrain, and wheel size. Then compare those details with the markings and construction of the installed assembly. The official E-Class page presents the current model line, but it cannot identify the brake package on an individual car.
- W214. Confirm the powertrain, drivetrain, wheel size, and any factory performance package.
- W213 and earlier generations. Use their own dimensional limits and service procedure.
- Mercedes-AMG and sport variants. Do not transfer rotor or pad dimensions from a standard version without a VIN check.
- Modified car. Match components to the calipers, rotors, and wheels that are actually installed.
How Regeneration Affects a Hybrid E-Class
In a plug-in hybrid, the electric drive can provide part of routine deceleration. Pad thickness may reduce more slowly, but the friction brakes also have fewer opportunities to clear moisture and light corrosion from the rotors. Inspect the complete swept area on the inboard and outboard faces; generous lining thickness alone does not prove that the brake assembly is healthy.
When the Components Actually Need Replacement
The manual for the individual vehicle helps interpret system messages, but it does not replace repair data for the installed brake assembly. Check minimum rotor thickness, permitted runout, and lining limits against the VIN and exact part. One value must not be transferred between E-Class generations or specifications.
- Usable friction material is close to the specified limit, damaged, or covered by a vehicle wear warning.
- Rotor thickness, thickness variation, or axial runout is outside specification after correct measurement.
- A swept face has cracking, deep grooves, substantial corrosion, heavy heat marking, chips, or contamination.
- Uneven wear accompanies a fault in the caliper, slides, hardware, or hub and the component cannot be retained safely.
A wear sensor does not monitor every lining or measure a rotor. Depending on specification, it reports only the designed monitoring point. An inner pad in another caliper, an inboard rotor face, or a restricted slide can deteriorate without a separate warning.
What to Check After Removing the Wheels
A view through the spokes is not enough because it reveals only part of the outboard side. With the wheels removed, record measurements for each corner, compare the inner pad with the outer pad, and compare the left side of an axle with the right.
| Component | Inspection method | Purpose |
|---|---|---|
| Pads | Measure usable friction material on every inner and outer pad | Find differences, taper wear, cracking, and contamination |
| Rotors | Measure thickness at several points without including the outer lip | Compare with the exact part limit and detect thickness variation |
| Runout and hub | Use a dial indicator on a clean mounting face | Separate rotor geometry from dirt, corrosion, or hub play |
| Caliper | Inspect piston, boots, slides, pad lands, and hardware | Find restricted movement, overheating, and uneven-wear causes |
Differences Between Pads Matter More Than an Average
A much thinner inner pad can point to piston operation or restricted return, while accelerated outer-pad wear can indicate slide or fit problems. Tapered material requires a free-movement check. Delamination, cracking, backing-plate damage, and brake-fluid contamination are judged separately from thickness.
A Rotor Needs More Than a Visual Check
An outer lip is not a measurement, and a clean outboard face does not confirm the inboard surface. Resurfacing can be considered only after checking starting thickness and the permitted finished dimension. Cracks, deep corrosion, heavy heat marking, or an out-of-limit size will normally require replacement of the axle pair.
How to Investigate Noise and Vibration
Before dismantling, record the conditions in which the symptom appears: with cold or warm brakes, after washing or parking, under light deceleration, or during heavy use. For vibration, note whether it is strongest through the steering wheel, pedal, or body. This directs the diagnosis but does not replace inspection.
| Symptom | Possible causes | Next step |
|---|---|---|
| Brief noise after parking | Moisture or light surface corrosion | Check whether it clears after several safe brake applications |
| Persistent squeal | Wear, glazing, contamination, vibration, or hardware | Remove the wheels and inspect both pads in each caliper |
| Metallic grinding | Critical wear or trapped debris | Stop normal use and inspect both rotor faces |
| Pulsation | Thickness variation, runout, dirty hub, or bearing play | Measure the rotor and hub before buying components |
| Pull or one hot wheel | Binding, hose fault, contamination, tyres, or suspension | Compare brake force and free wheel rotation |
Why a New Rotor May Not Cure Pulsation
Repeat vibration can result from transferred pad material, thickness variation, corrosion between rotor and hub, bearing play, or uneven wheel-fastener torque. A new rotor mounted against a contaminated face can develop runout again. Confirm the cause with a micrometer and dial indicator rather than pedal feel alone.
Conditions That Accelerate E-Class Brake Wear
- frequent hard braking, sustained speed, and operation with a heavy load;
- urban routes with repeated stops and extended dense traffic;
- long descents with continuous pedal pressure;
- high ambient heat, dust, and sand around boots and slides;
- extended parking after washing or moisture reaches the swept surfaces;
- tight pad movement, a binding piston, damaged boot, or unsuitable lubricant;
- aftermarket wheels and modifications that change mass, cooling, or brake load.
Hot weather does not create a separate replacement interval, but it reduces cooling margin during demanding use. After overheating, inspect pads, rotors, boots, hoses, brake fluid, and free wheel rotation. Fresh friction material cannot correct a binding caliper.
Rear-Brake Work Requires the Correct Service Mode
Do not force an electronic parking-brake actuator back with ordinary tools without the prescribed procedure. The sequence for moving it into the installation position depends on the version. After assembly, check instrument messages, parking-brake operation, pedal feel, and the required basic system functions.
Diagnosis and Service Checklist
This sequence moves from vehicle identification to measurement, correction of the cause, and safe final verification. It suits scheduled service and the assessment of a used E-Class.
☐ Record the VIN, model designation, chassis code, powertrain, drivetrain, and wheel size.
☐ Define the complaint and the conditions that produce noise, vibration, pull, or heat.
☐ Read brake-system messages and retain diagnostic information before dismantling.
☐ Remove the wheels and measure the inner and outer pads in every caliper.
☐ Measure rotor thickness at several points and compare it with the exact part limit.
☐ Check thickness variation, runout, hub cleanliness, and bearing play.
☐ Inspect pistons, boots, slides, hardware, hoses, and parking-brake mechanism.
☐ Select pads, rotors, sensors, and single-use hardware by VIN and installed assembly.
☐ Assemble to the correct procedure and tighten the wheels evenly.
☐ Complete the required bedding process and verify pedal, warnings, and braking.
Mistakes to Avoid
- selecting parts from the E-Class name or wheel size alone;
- replacing one pad or repairing only one side of an axle;
- judging a rotor without measurement and an inboard inspection;
- installing new components before correcting hub corrosion or restricted caliper movement;
- clearing warnings before repair and final verification are complete;
- conducting a road test with leakage, an unsafe pedal, or an overheated wheel.
Conclusion
Mercedes-Benz E-Class brake pads and rotors should be replaced according to measured condition and the limits for the exact component, not one universal mileage. Confirm the VIN and brake package, compare every pad, measure both rotor faces, inspect calipers and hubs, and correct the cause of uneven wear.
When considering a used E-Class, current listings help compare generations and specifications, but photographs and stated mileage do not prove brake condition. Review service history, inspect the car on a lift, use measuring tools, and complete a safe road test after the initial diagnosis.


