


When should brake pads and rotors be replaced on a Toyota Land Cruiser Prado?
Toyota Land Cruiser Prado
Toyota Land Cruiser Prado•
•145 просмотров
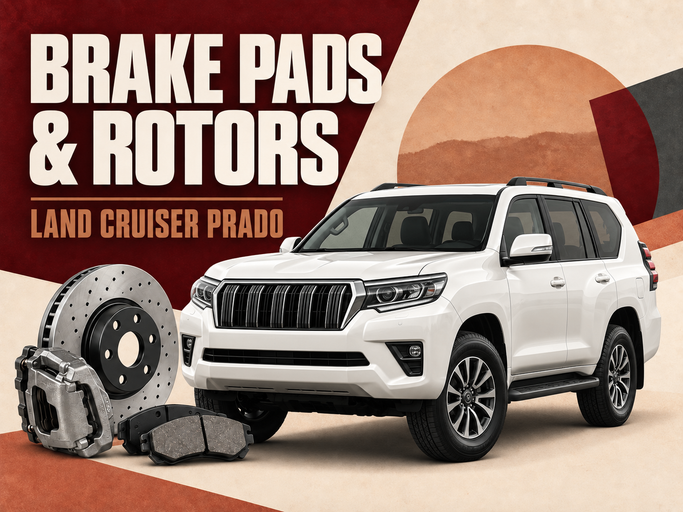
There is no universal mileage at which every Toyota Land Cruiser Prado must receive new brake pads and rotors. Wear changes with vehicle mass, repeated urban stops, towing, sand driving and long descents. Treat the maintenance schedule as a prompt for inspection, then make the replacement decision from measurements and the SUV's behaviour under braking.
4 signs that a Toyota Land Cruiser Prado brake system needs attention
A single symptom rarely points to one failed component. A squeal may come from a wear indicator or restricted sliding hardware, while a shake may begin at the rotor, hub, wheel or suspension. Record the conditions in which the fault appears and compare the brakes on both axles.
- Metallic squeal or grinding. A steady sound related to wheel rotation can begin when a wear indicator reaches the rotor. Coarse grinding is more serious because the friction layer may be gone. Stop routine use until the pads, rotor and caliper have been inspected.
- Pedal pulsation or steering vibration. A repeatable shake during gentle deceleration calls for rotor-thickness and lateral-runout measurements. Also inspect the hub mounting face, wheel fastening and suspension. Brief ABS feedback in an emergency stop is a separate condition.
- The vehicle moves away from its line. Unequal braking force can result from a restricted piston or slide, contaminated lining, tyre condition or a suspension fault. Compare the left and right sides instead of replacing the first visibly worn part.
- The pedal feels softer and braking becomes weaker. Extra travel, the need for more pressure, a hot-brake odour or a change in response needs prompt diagnosis. Check the fluid, hydraulic integrity, booster and electronic systems as well as the friction components.
Why delaying brake service is unsafe and expensive
The Land Cruiser Prado is a heavy body-on-frame SUV. At full load, while towing or at higher road speed, its brakes must absorb more energy. A reduction in reserve can develop quietly, yet passing a wear limit may damage several parts in a short distance.
- Heat arrives sooner. Thin lining and an incomplete contact patch transfer and shed heat less effectively. During repeated stops or a long descent, pedal response can change from one application to the next.
- Rotors become deeply scored. Once the usable friction layer has disappeared, the pad backing damages the rotor face. Work that might have required pads alone can then expand to a rotor replacement.
- Calipers and protective components carry extra stress. A dragging pad raises the temperature of dust boots, lubricant and the hub area. Warning signs include odour, smoke or one wheel that is clearly hotter than the others.
- Braking stability deteriorates. A left-to-right force difference is easier to feel on sand, dusty asphalt or during a manoeuvre. Electronic driver aids cannot repair a mechanical brake fault.
- Secondary costs increase. A restricted mechanism accelerates wear in the tyre, hub and new friction components. Unless the original cause is removed, fresh pads can quickly develop an uneven contact pattern.
Toyota guidance for the Prado brake system
Toyota owner manuals treat wear-indicator noise as a reason to inspect the pads without delay. Driving after the friction layer has disappeared can damage a rotor and increase the pedal effort needed to stop. Inspect the front and rear axles separately even when the symptom seems to come from only one end of the vehicle.
| Assembly | What to measure or inspect | When action is needed |
|---|---|---|
| Front pads | Material on inner and outer pads, wear balance, cracks, contamination, indicator position and free movement. | Act at the stated wear limit or when indicator noise persists, material separates, contamination is present, or side-to-side wear differs markedly. |
| Front rotors | Measure working thickness around the disc, thickness variation and lateral runout; identify scoring, cracks, corrosion and heat marks. | Replace or service as specified when thickness is under the limit, physical damage exists, or an approved correction cannot resolve runout or friction variation. |
| Rear pads and rotors | Remaining lining, rotor thickness and surface, caliper operation, dust boots and parking-brake hardware. | For limit wear, binding, damage, overheating or inadequate vehicle holding. |
| Hydraulics and controls | Inspect pipes and flexible hoses, fluid quantity and condition, hydraulic sealing, pedal travel, booster operation and warning lamps. | Correct any leak, abnormal pedal movement or system fault before fitting consumables. |
How to select brake parts for a Toyota Land Cruiser Prado
Land Cruiser Prado covers several generations, engines, wheel packages and destination markets. Caliper design, rotor diameter and parking-brake hardware can therefore vary. A photograph or model year alone is not reliable evidence of fitment; begin with the VIN.
- Exact VIN-matched number. A single generation may use several brake packages. Confirm the front and rear pads, rotors, shims and fitting hardware separately.
- Suitable friction material. The compound must retain stable friction when hot and remain compatible with the rotor. An unknown, overly aggressive lining can create noise and shorten the life of the working surface.
- Correct rotor dimensions. Verify diameter, original and minimum thickness, overall height, ventilation and mounting pattern. Visual resemblance does not establish compatibility.
- Symmetrical work across an axle. Install pads as a complete left-to-right set. Measure and compare both rotors; if one has reached its limit or cannot be corrected by an approved method, decide on the pair.
- Rear brakes and parking mechanism. The Prado's rear axle needs the same complete review of rotors, pads and calipers as the front. Confirm the parking-brake layout, cables or electric actuator for the exact VIN.
Current listings for the Toyota Land Cruiser Prado can help identify the generation and production years. Confirm final pad, rotor and fitting-kit numbers by VIN.
Why can a Prado squeal, shake or brake unevenly?
Noise or judder immediately after a repair does not prove that the new parts are poor. Debris between rotor and hub can create runout; misplaced shims, restricted slides or patchy material transfer can cause noise. Diagnosis should locate the source rather than hide the symptom.
| Symptom | Likely causes | What to check |
|---|---|---|
| Squeal under light braking | Wear indicator, sand, glazed lining or shim movement | Measure the pads; inspect the rotor, shims and sliding hardware |
| Coarse grinding | Friction layer is gone or a hard object is trapped | Stop routine use; inspect the rotor, pads and caliper |
| Pedal pulsation | Rotor runout or thickness variation, hub debris; ABS feedback | Measure rotor and hub; identify the operating conditions |
| Pulling while braking | Restricted caliper, contaminated lining, tyre or suspension fault | Compare wear, temperature and braking force left to right |
| One wheel runs hot | Pad not releasing or restricted piston or slide movement | Inspect caliper, hose, rotor and parking-brake hardware |
| Odour or smoke | Overload, prolonged braking or a dragging mechanism | Stop safely, avoid water cooling and arrange diagnosis |
How sand, heat and descents change Prado brake wear
SUV use can combine high ambient temperature, dust, passengers and changing terrain. There is no single shortened replacement interval for hot climates, but a dune trip, towing run or long descent should be followed by attention to odour, noise, braking balance and unusual wheel-temperature differences.
- Passengers and luggage. Added mass increases the energy that must be removed at every stop. Allow for the actual operating load and leave a larger distance margin.
- Towing and long descents. Select a suitable gear before the slope and use engine braking. Continuous pedal pressure prevents useful cooling between brake applications.
- Sand and dust. Contamination can restrict slide movement and reach the working surfaces. After demanding terrain, inspect the dust boots, listen for new noises and confirm that every wheel rotates freely.
- Sudden water cooling. Do not direct cold water at very hot rotors immediately after hard use. Let the assemblies lose heat gradually without a sharp temperature change.
- Humidity during long parking. A thin film of surface rust may disappear after several gentle, controlled stops. Deep corrosion, persistent noise or newly developed pulsation requires inspection.
Practical sequence for brake inspection and replacement
- Record when the symptom occurs. Note speed, load, gradient, brake temperature, steering position and the exact moment at which noise or pulling begins. This evidence shortens diagnosis time.
- Compare both sides of each axle. Inspect the inner and outer pads instead of relying on the edge visible through a wheel spoke. A marked difference suggests restricted piston or slide movement.
- Inspect the rear brakes as thoroughly as the front. Measure the pads and rotors; check calipers, dust boots, hoses and parking-brake components. A quiet rear axle can still be overheating.
- Ask for measurements on the repair order. A useful record includes remaining lining, thickness and runout for each rotor, plus the correct limits for that vehicle. A verbal estimate is not a measurement.
- Remove the cause of uneven wear. Before new consumables are installed, restore free caliper travel, clean the hub, inspect the hose, parking-brake mechanism and protective boots.
- Bed new components in correctly. Follow the parts maker's procedure, avoid unnecessary emergency-level stops and do not hold very hot pads against one rotor position while stationary. Road safety remains the priority.
- Assess the brakes on a pre-owned vehicle. Before purchase, inspect the remaining lining, every rotor, braking balance and signs of overheating. An objective assessment requires a lift, measuring tools and a safe road test.
Common brake-service mistakes
- Inspecting only the front axle. Rear components can wear differently and may not produce immediate noise. Compare pads, rotors and calipers at all four wheels.
- Ordering parts from model year alone. One year can contain different generations, engines, wheel packages and market specifications. A mismatch in profile or thickness may appear only after disassembly.
- Installing pads on unchecked rotors. Fresh lining cannot correct deep scoring, excessive runout or a rotor already below its thickness limit. The new pads may soon develop an incomplete contact pattern.
- Servicing only one side. Unequal friction behaviour across an axle produces unequal braking force. Replace the left and right components as a set and remove the associated fault before reassembly.
- Treating a soft pedal as ordinary pad wear. Air, leakage, overheated fluid or a booster fault may be responsible. Investigate the change promptly instead of waiting for the next scheduled visit.
Conclusion
Replace Toyota Land Cruiser Prado brake pads and rotors according to inspection results and measurements, not an average mileage. Full loads, towing, sand, repeated stops and long descents justify closer monitoring. Grinding, pulling, pulsation or a clear loss of braking performance requires diagnosis before routine driving continues. Service components symmetrically across each axle and confirm the exact brake package by VIN.


